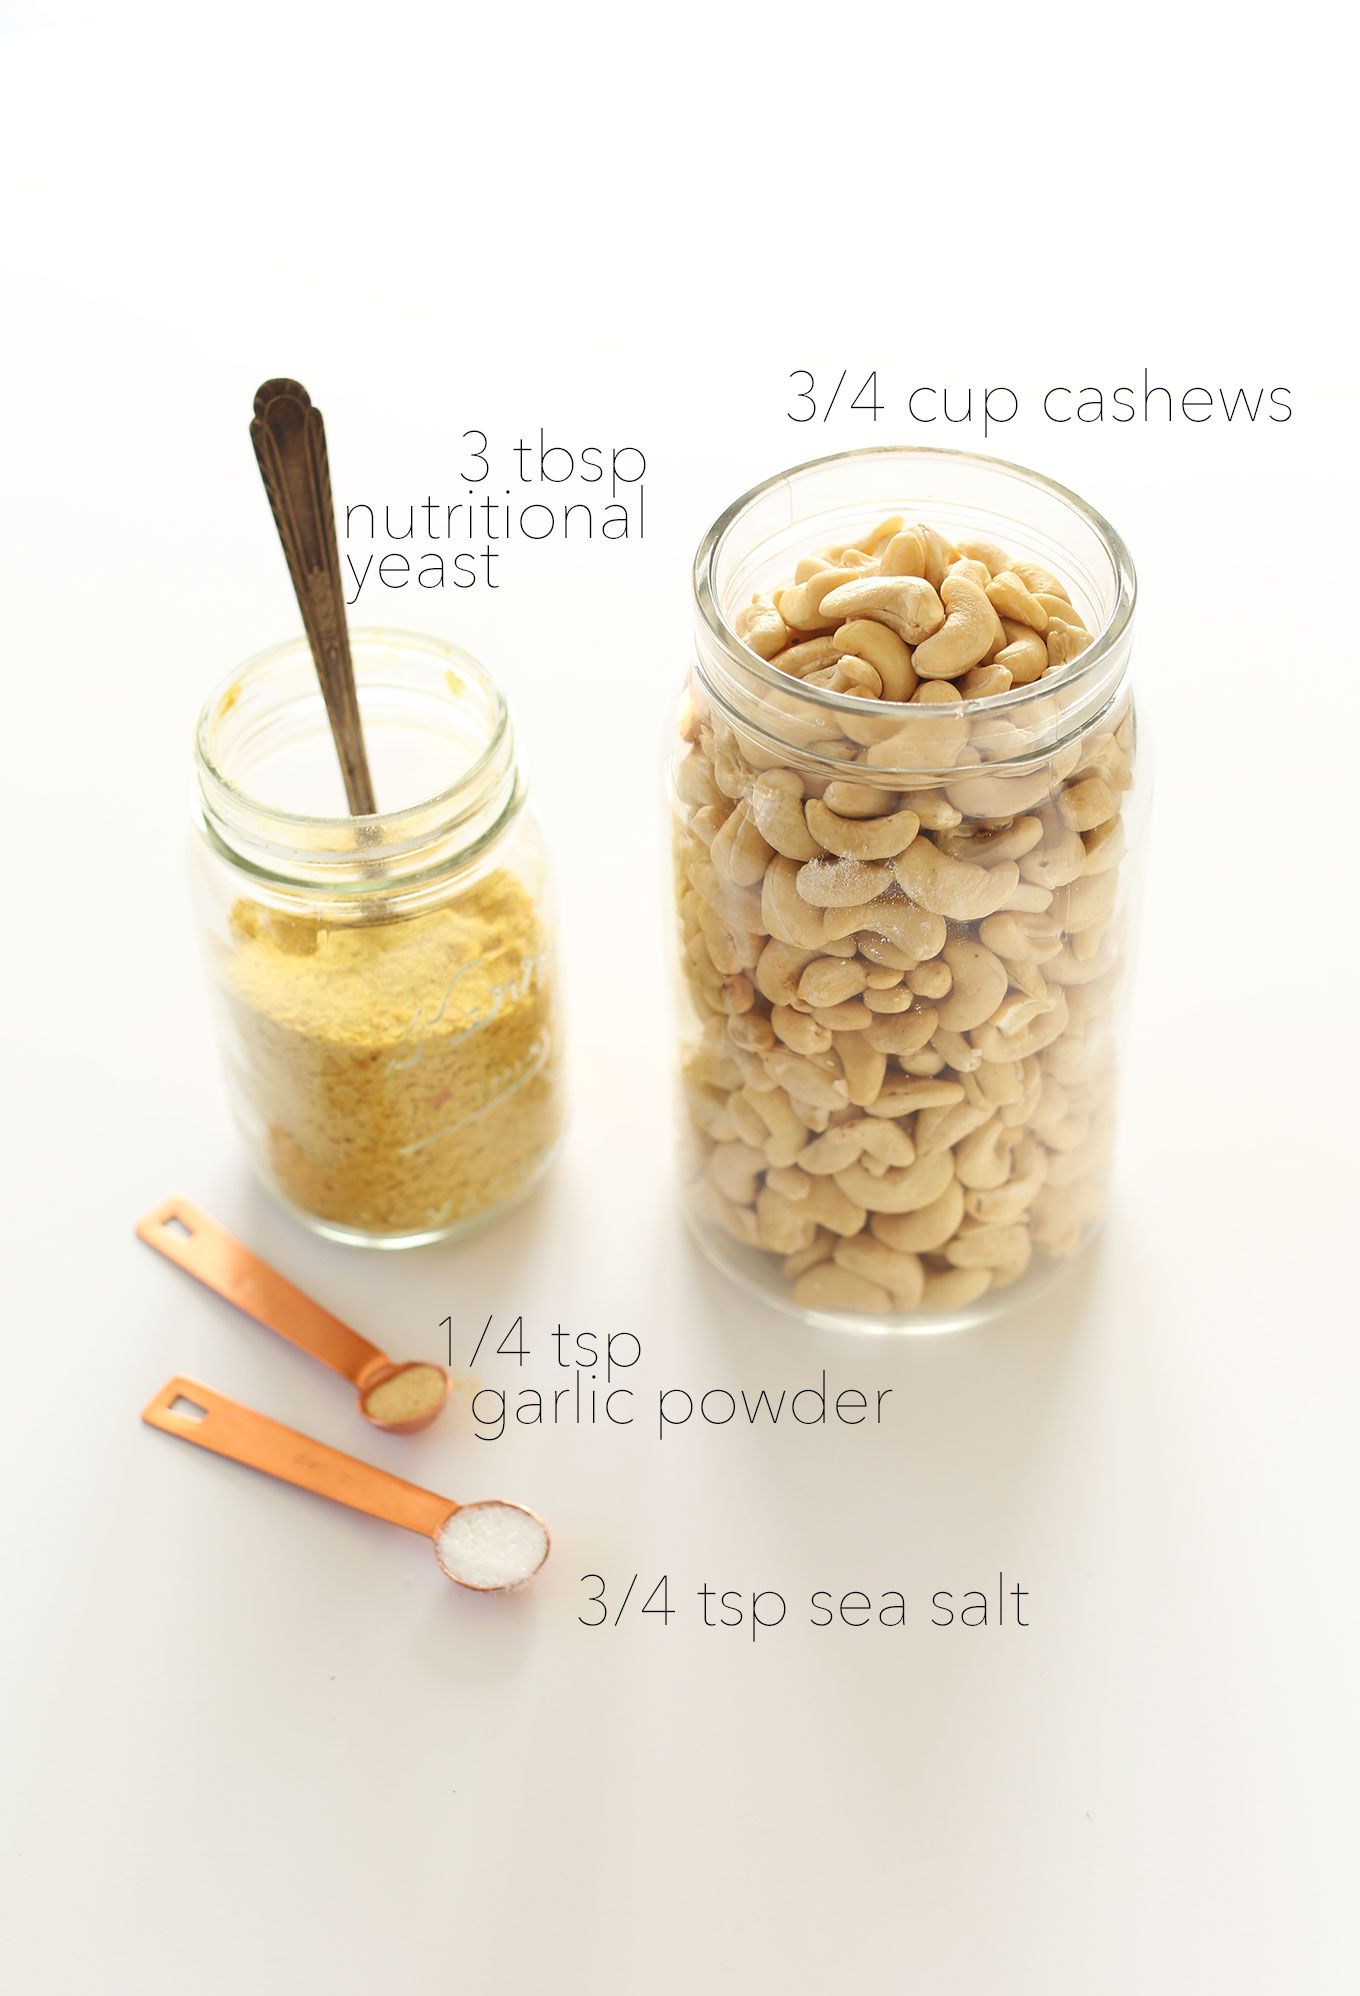
INGREDIENTS: 1/2 cup raw cashews 1/2 cup water 3 tablespoons lemon juice 2 tablespoons nutritional yeast 1 tablespoon dijon mustard 1/2 tablespoon vegan Worcestershire 2 teaspoons capers, drained 1 garlic clove 1/2 teaspoon sea salt, or to taste 1/8 teaspoon black pepper, or to taste
INSTRUCTIONS: 1. Bring a small pot of water to a boil. Once boiling, remove it from heat. Add in the raw cashews and allow them to soak for 20 minutes, or until softened.
2. Drain the cashews and add them into a high-speed blender along with the remaining ingredients, except for the salt and pepper. Process until smooth and season with salt and pepper to taste. Add more water if necessary to reach a dressing like consistency.
3. Store in an airtight container in the refrigerator for up to 1 week.
This is NOT on our “clean” menu, but delish. So eat infrequently!
Commercial Ingredients
Water, Yellow Pea Protein*, Avocado Oil, Brown Rice Protein, Natural Flavors, Methylcellulose, 2% or less of Inulin, Oat Bran, Sunflower Lecithin, Vinegar, Yeast Extract, Oat Fiber, Lemon Juice Concentrate, Rice Starch, Vegetable Juice Color, Pea Starch, Salt, Spices, Apple Extract, Potato Starch, Calcium Chloride, Citric Acid, Potassium Salt, Pomegranate Concentrate, Onion Powder, Paprika Extract; Sodium Alginate Casing.
***************
The following oil-free “clean” copycat uses Soy Curls to provide the fibrous chew of Beyond Meat, while replacing the processed binders and oils with whole-food alternatives like oats and white beans.
CLEAN SOY CURL SAUSAGE LINK COPYCAT RECIPE
Yields: 6-8 patties, links or crumbles Prep time: 15 mins | Cook time: 10 mins
The Ingredients
The Base: 4 oz dry Butler Soy Curls (rehydrated in warm water, then squeezed dry and pulsed in a processor until “ground” texture).
The “Fat” & Moisture: ½ cup mashed Cannellini beans (provides creaminess without avocado oil).
The Binder: ¼ cup Bob’s Red Mill Oat Bran or oat flour (rolled oats ground in your blender)
Umami & Depth: 1 tbsp Bragg Nutritional Yeast, 1 tsp white miso paste, and 1 tsp onion powder.
The “Beyond” Color: 1 tsp beet juice or a pinch of hibiscus powder (mimics the pomegranate/vegetable juice color).
The Signature Spice Blend: 1 tsp dried sage, 1 tsp smoked paprika (for the “snap” flavor), ½ tsp fennel seeds (crushed), and a pinch of red pepper flakes.
Acidity: 1 tsp apple cider vinegar or lemon juice.
Instructions
Prep the Curls: Soak soy curls for 10 minutes. Squeeze out every drop of water. Pulse them in a food processor about 5–8 times until they look like coarse ground meat.
Mix the “Fat” and Flavor: In a large bowl, whisk the mashed beans, miso, nutritional yeast, spices, and beet juice until a thick paste forms.
Combine: Fold the ground soy curls and oat bran into the paste. Use your hands to work it together until it holds its shape. If it’s too wet, add another tablespoon of oat bran.
Shape: Form into small breakfast links or patties or scroll down to see wrapped links
Oil-Free Sear: Heat a high-quality non-stick skillet or use Lodge Cast Iron over medium heat. Brown the sausages for 4-5 minutes per side. Use a splash of vegetable broth if they start to stick.
Why this is “Cleaner”
No Methylcellulose: Uses oat bran and beans to bind rather than synthetic thickeners.
Whole Food Fats: Replaces refined avocado oil with fiber-rich legumes.
No “Natural Flavors”: Relies on whole spices, miso, and nutritional yeast for that savory “sausage” profile.
*****
To get that signature “snap” without oil or commercial casings, rice paper is the best whole-food solution. It creates a thin, edible skin that holds the soy curl mixture together and crisps up when heated.
The Rice Paper “Skin” Method
Prep the Wrappers: Take standard round rice paper sheets (spring roll wrappers). Use a pair of kitchen shears to cut them into halves or quarters, depending on how large you want your links to be.
Soak: Dip a piece of rice paper into a shallow bowl of warm water for about 10–15 seconds. It should be pliable but not completely mushy.
Form & Roll:
Lay the damp paper on a clean cutting board.
Place 2–3 tablespoons of your soy curl mixture near the bottom edge, shaping it into a log.
Fold the bottom edge over the filling, tuck in the sides, and roll forward tightly—just like a mini burrito.
Double Layer (Optional): For a thicker, crunchier “casing,” roll the link a second time in another piece of damp rice paper.
The “Sear”: Place the links in a high-quality non-stick skillet over medium-low heat.
Crucial Tip: Leave space between them! Rice paper is very sticky when wet and they will fuse together if they touch before the “skin” sets.
Cook for 3–5 minutes per side until the paper is golden and firm.
Tips for Success
Don’t Overfill: If the links are too fat, the rice paper might tear during the rolling or cooking process.
Dry Before Frying: Let the rolled links sit for about 5 minutes on a wire rack or parchment paper before putting them in the pan; this helps the paper “tighten” around the filling.
***************
If using a white enameled high quality Dutch oven:
Deglaze Often: Use small amounts of liquid to “deglaze” the pan as you cook to release any stuck bits and keep the soy curl links moving.
Low and Slow: Cast iron holds heat extremely well. Use lower settings than you would on a standard pan to avoid scorching the rice paper skins.
Dressing: 2 tablespoons walnut oil 1 tablespoon raw, unfiltered apple cider vinegar 1 clove garlic, pressed Sea salt to taste 1/2 teaspoon freshly ground black pepper Pinch cayenne
Salad: 1 cup brown rice, cooked 1/2 cup pecans, chopped 2 tablespoons fresh dill, chopped 1 yellow bell pepper, diced 1 cup cherry tomatoes, halved 1 scallion, chopped finely Whisk oil, vinegar, garlic, salt, pepper, and cayenne together in a small bowl. Place brown rice, pecans, dill, yellow bell pepper, tomato and scallion in a salad bowl and toss the salad with the dressing
Heat 1 Tbsp water or broth in a large pot over medium high heat, crumble in meat substitute and cook, stirring occasionally until cooked through.
Transfer to a plate, set aside. Heat another 1 Tbsp water or broth in same pot.
Add onions, carrots, and celery and water saute (wauté) over medium-high heat until tender about 6 minutes, add garlic and wauté 1 minute longer.
Add veggie broth, tomato sauce, canned tomatoes, sugar, basil, oregano, thyme, marjoram and cooked optional meat sub, then season with salt and pepper to taste.
Bring to a boil then reduce heat to medium-low, cover with lid and allow to simmer, stirring occasionally, until veggies are soft, about 15 – 20 minutes.
Meanwhile prepare ditalani/pasta according to directions on package, cooking to al dente.
Add cooked and drained pasta to soup* along with kidney beans and great northern beans. Thin with a little more broth or water if desired.
Allow to cook 1 minute longer. Stir in parsley, serve warm with vegan parmesan cheese.
* 2 cups Brown Basmati Rice (rinsed well) * 14.5 oz can Chopped Tomatoes (with liquid) * 3 cups Water * 3 tsp Better Than Bouillon (mixed into the water) * 8.2 oz bag Frozen Mixed Mexican Veggies * 1 bag Frozen Onion & Peppers mix * ½ cup Frozen Shelled Edamame * Optional: A pinch of cumin or chili powder if you want to lean into those Spanish flavors.
Instructions
1. Prep the Base: Rinse your 2 cups of brown basmati in a fine-mesh strainer until the water is clear. 2. Mix the Liquid: Stir the 3 teaspoons of Better Than Bouillon into the 3 cups of water until dissolved. 3. Load the Cooker: Add the rinsed rice, the bouillon water, the full can of tomatoes, and all the frozen veggies (Mexican mix, onion/peppers, and edamame) into the rice cooker pot. 4. The Stir: Mix everything thoroughly. Make sure the rice isn’t clumped at the bottom so it cooks evenly with the moisture from the vegetables. 5. Cycle: Set the rice cooker to the “Brown Rice” setting. 6. The “Must-Do” Rest: Once the timer goes off, let the rice sit—lid closed—for 10–15 minutes. This ensures the brown basmati and edamame reach the perfect tender texture. 7. Serve: Fluff gently with a fork or paddle to distribute the colorful veggies.
A Quick Tip: If you notice the rice is a bit “wet” at the end, just leave the lid off for 2 minutes after fluffing to let the excess steam escape.
Yields: 6 or 7 cups
Recommendation: Top with fresh cilantro and a squeeze of lime juice. Serve with black beans on the side.