* Prep time: 10 minutes
* Cook time: 5 minutes
* Chill time: 2 hours
* Yield: 1 small cheese block (approx. 12 oz)
Ingredients
* 1/2 cup raw cashews (soaked in boiling water for 15 minutes and rinsed, or sub 1/2 cup rinsed cannellini beans for a lower-fat option, or go 50/50)
* 1 cup water (divided into two 1/2 cup portions)
* 3 tbsp nutritional yeast (for that classic umami base)
* 1 tbsp apple cider vinegar or lemon juice (for Swiss sharpness)
* 1 tsp chickpea miso or white miso paste (for a deep, fermented flavor with minimal sodium)
* 1/2 tsp onion powder
* 1/4 tsp garlic powder
* 1/8 tsp ground mustard seed (optional, adds a sharp background note)
* 1 tbsp tapioca starch / flour (gives the cheese its authentic elastic stretch)
* 1 tbsp agar-agar powder (do not use agar flakes; powder is required for firm setting)
Cooking Instructions
1. Blend the Base: Add the soaked cashews (or beans), 1/2 cup of the water, nutritional yeast, vinegar, miso, onion powder, garlic powder, ground mustard, and tapioca starch to a high-speed blender. Blend on high until completely smooth with absolutely no grit remaining.
2. Activate the Agar: In a small saucepan, whisk the remaining 1/2 cup of water and the agar-agar powder together until dissolved. Bring to a boil over medium-high heat, stirring constantly. Let it boil rapidly for 1 full minute to activate the setting properties. It will turn into a thick, clear gel.
3. Combine and Cook: Turn the heat down to medium-low. Immediately pour the blender mixture directly into the saucepan with the boiling agar gel. Whisk vigorously and continuously. The mixture will quickly become very thick, glossy, and stretchy. Cook for 2 minutes, stirring constantly to prevent scorching.
4. Mold the Block: Quickly pour the hot mixture into a small, heat-safe silicone mold or a small glass container.
5. Create “Swiss Holes” (Optional): Let it sit for 2 minutes to slightly skin over. Take the clean end of a chopstick or a straw and poke a few random holes downward into the cheese to mimic the holes of traditional Swiss.
6. Chill to Set: Let the container cool completely on the counter. Cover it and place it in the refrigerator for at least 2 hours until totally cold and firm.
Once fully chilled, unmold the block. Slice it thin using a sharp knife or a wire cheese slicer, and build your cold sandwich on your favorite oil-free whole grain bread. Keep covered in the refrigerator for up to 5 days.
Category: Recipes I Have Tried
Modified Teriyaki Bowl
Low-SOS vegan recipe below photo
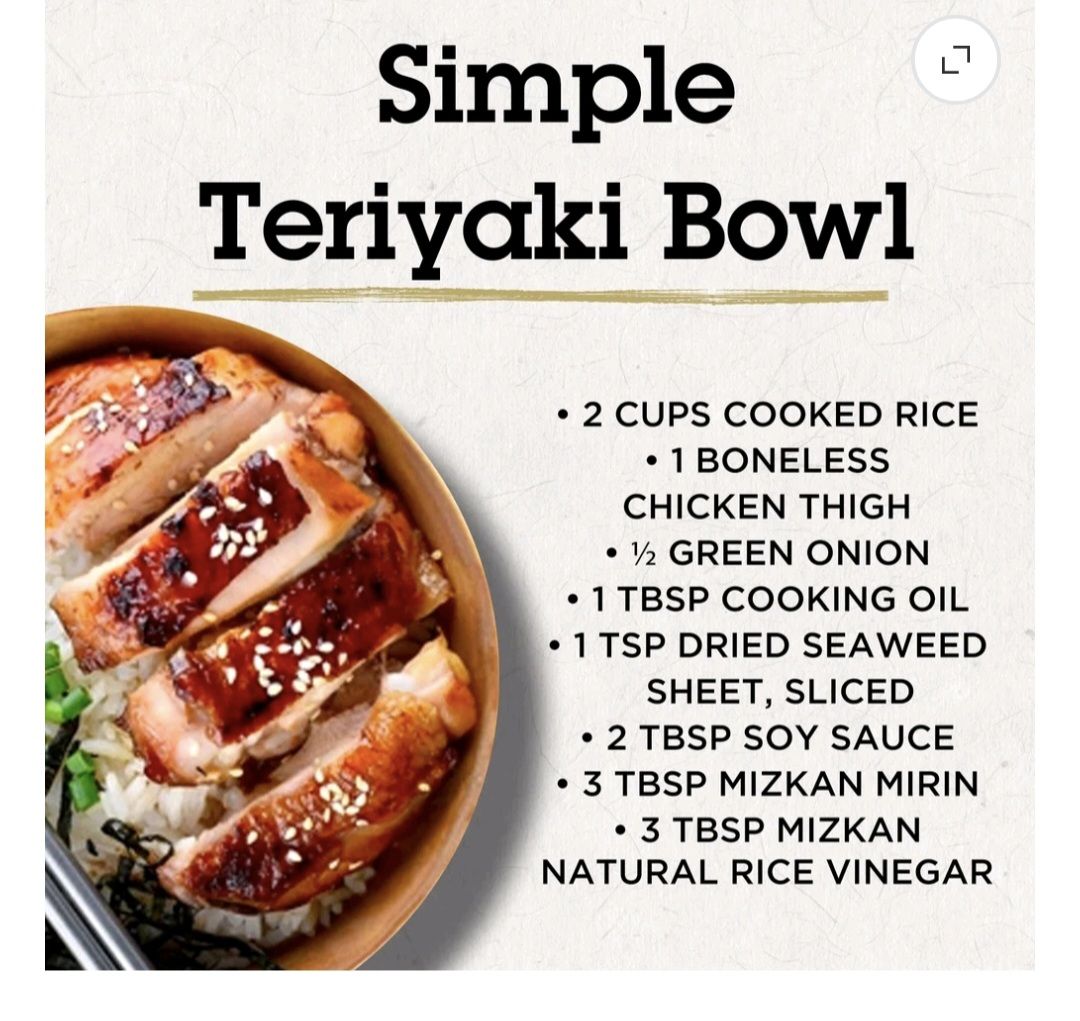
Here is a plant-based, low-SOS (low salt, oil, and sugar) version of your teriyaki bowl using hearty mushrooms and rehydrated soy curls.
Ingredients
- Base: 2 cups cooked brown or white rice
- Main: 1 cup Butler Soy Curls (soaked in warm water for 10 minutes, drained, and squeezed dry)
- Main: 1 cup sliced mushrooms (cremini or shiitake)
- Garnish: 1 green onion, chopped
- Garnish: 1 tsp dried seaweed sheets, sliced
- Cooking Liquid: 2 tbsp water (used instead of oil)
- Sauce: 1 tbsp low-sodium tamari or coconut aminos (low salt)
- Sauce: 2 tbsp rice vinegar
- Sauce: 1 tbsp date paste or pure maple syrup (replaces sugary mirin)
Instructions
- Prepare the Protein: Soak the dry soy curls in warm water for 10 minutes. Drain them well and gently squeeze out extra water.
- Sauté Without Oil: Heat a pan over medium heat. Add 2 tablespoons of water instead of cooking oil.
- Cook the Vegetables: Add the sliced mushrooms and prepared soy curls to the pan. Cook for 5 minutes until the mushrooms turn soft and brown.
- Mix the Sauce: Whisk together the low-sodium tamari, rice vinegar, and date paste in a small bowl.
- Glaze: Pour the sauce into the pan over the mushrooms and soy curls. Stir constantly for 2 minutes until the liquid thickens and coats the mixture.
- Assemble: Divide the cooked rice into bowls. Top with the warm mushroom and soy curl mixture.
- Finish: Sprinkle the chopped green onions and sliced seaweed on top.
Fat Free Onion Rings!
Ingredients:
🧅 1 huge onion
🫘 Chickpea flour
🧂 Salt
🧀 Nutritional yeast
🌶️ Smoked paprika
🧄 Garlic powder
🌽 Corn flour
💧 Water
🥖 Breadcrumbs
Sauce:
🥣 Greek-style soy yogurt
🍅 Ketchup
🍎 A splash of vinegar
🧂 Salt
Optional:
🥄 Baking powder — for turning leftover batter into a savoury pancake
Method:
1️⃣ Slice the onion into rings.
2️⃣ In a bowl, combine the chickpea flour, salt, nutritional yeast, smoked paprika, garlic powder, and corn flour.
3️⃣ Add water and whisk until you have a smooth batter.
4️⃣ Place the breadcrumbs in a separate bowl.
5️⃣ Dip each onion ring into the batter, then coat thoroughly with breadcrumbs.
6️⃣ Place the coated onion rings into the air fryer and cook for around 10 minutes, or until crispy and golden.
7️⃣ While they cook, mix together the Greek-style soy yogurt, ketchup, vinegar, and salt to make a simple dipping sauce.
8️⃣ Serve the crispy onion rings with the sauce and enjoy! 🧅🔥
If you have any leftover chickpea batter, don’t throw it away! Add a little baking powder and cook it up as a huge savoury pancake.
These onion rings are crispy, crunchy, completely oil-free, and made with simple plant-based ingredients. Perfect when you want something that feels indulgent while still keeping your meal high-volume and satisfying. 💚
Chickpea Tofu & Silken Tofu (Soy-Free) – by Elavegan
Ingredients
Quick Chickpea Flour Method
▢1 cup (100 g) chickpea flour
▢2-2½ cups (600 ml) of water (divided) – see notes
▢½-¾ tsp salt (optional)
▢⅛-¼ tsp turmeric (optional)
OR – Dried Chickpeas Method (Similar To Silken Tofu)
▢1 cup (200 g) dried chickpeas (raw)
▢2 cups (480 ml) water
Instructions
Quick Chickpea Flour Method
You can watch the video in the post for visual instructions.
In a bowl, mix the chickpea flour and 1 cup (240 ml) of water with a whisk. Use just ½ cup (120 ml) water for firmer tofu.
In a saucepan, bring 1½ cups (360 ml) of water to a boil. As soon as it boils, slowly pour the chickpea mixture into the water while stirring constantly.
Let simmer on low heat for at least 5-6 minutes, and make sure to keep whisking frequently. Pour the mixture into a 6×6-inch mold (or several smaller molds) and let it firm up.
Optionally, place the mold(s) into your refrigerator, to firm up even more (the longer it sits, the firmer it gets). Once the chickpea tofu is firmed up, you can unmold it and use it as you would use regular tofu. Enjoy!
Dried Chickpeas Method (Silken Tofu)
Add the dried chickpeas to a large bowl and add plenty of water until they are covered with at least 2 inches (5 cm) of water. Soak them overnight (or up to 1 day), then drain the water through a strainer and give the chickpeas a quick rinse.
Grease a mold (e.g. a 6×6-inch glass pan) or several ramekins with a little oil and set aside.
Transfer the chickpeas into a blender and add 2 cups of fresh water. Blend for about 20-30 seconds, then strain the mixture into a large bowl through a nut-milk bag and try to squeeze out as much liquid as possible. If you have some leftovers in the blender jug, then add 1-2 tablespoons of water and use a silicone spatula to get it all out.
Add the strained liquid into a medium saucepan and bring it to a boil, stirring constantly with a whisk until it starts simmering. It’s important to stir a lot because the starch of the chickpeas will float to the bottom of the pan and begin to clump, if you don’t stir constantly.
Once the mixture starts simmering, turn the heat to low and keep simmering for about 20 minutes, stirring often. The consistency will be like thick pudding. The longer you let it simmer, the firmer the silken tofu will be, as more water will evaporate.
Pour the cooked mixture into the prepared mold(s) and smooth the top with a spatula. Let it cool at room temperature for a few hours to set.
Optionally, place the mold(s) into your refrigerator, to firm up even more (the longer it sits, the firmer it gets). Once the chickpea tofu is firmed up, you can unmold it and use it as you would use silken tofu. Enjoy!
🥟 RICE PAPER DUMPLINGS🔥 Vegan, Oil Free & Maximum Weight Loss!!
Ingredients:
🍄 Mushrooms
🥒 Courgette
🥕 Carrot
🥬 Cabbage
🧈 Tofu
🍚 Rice paper
🥢 Soy sauce
🍶 Rice vinegar
🧄 Garlic powder
🌶️ Sweet chili sauce
✨ Sesame seeds
Method:
1️⃣ Add the mushrooms, courgette, carrot, cabbage, and tofu to a food processor and blitz until finely chopped.
2️⃣ Transfer the mixture to a non-stick pan. Add the soy sauce and garlic powder, then cook for a few minutes until the vegetables soften.
3️⃣ Dip a sheet of rice paper into water until softened.
4️⃣ Place some of the filling in the centre and fold into a sealed parcel.
5️⃣ Sprinkle sesame seeds into a non-stick pan and cook the dumplings on top of the sesame seeds until golden and crispy on both sides. [OR USE AIR FRYER!]
6️⃣ Mix together the soy sauce, rice vinegar, and sweet chili sauce for a quick dipping sauce.
7️⃣ Serve the dumplings with the dipping sauce and enjoy.
🥖 How to Bake the Parcels in a Regular Oven
Baking keeps this recipe oil-free while giving you that satisfying, crispy exterior.
* Preheat: Set your oven to 400°F (200°C).
* Prep the Baking Sheet: Line your pan with parchment paper or a silicone baking mat. This is essential because wet rice paper is incredibly sticky and will tear on bare metal.
* Space Them Out: Place the folded parcels on the tray, leaving at least 1 inch of space between each one. If they touch, they will fuse together and rip.
* Bake: Bake for 15 to 20 minutes, flipping them over halfway through the cooking time.
* Optional Crisp Boost: If you want them extra golden and crunchy, turn on your oven’s broiler for the last 2 to 3 minutes. Keep a close eye on them so the rice paper doesn’t burn!
SWEET POTATO SMASH TACOS
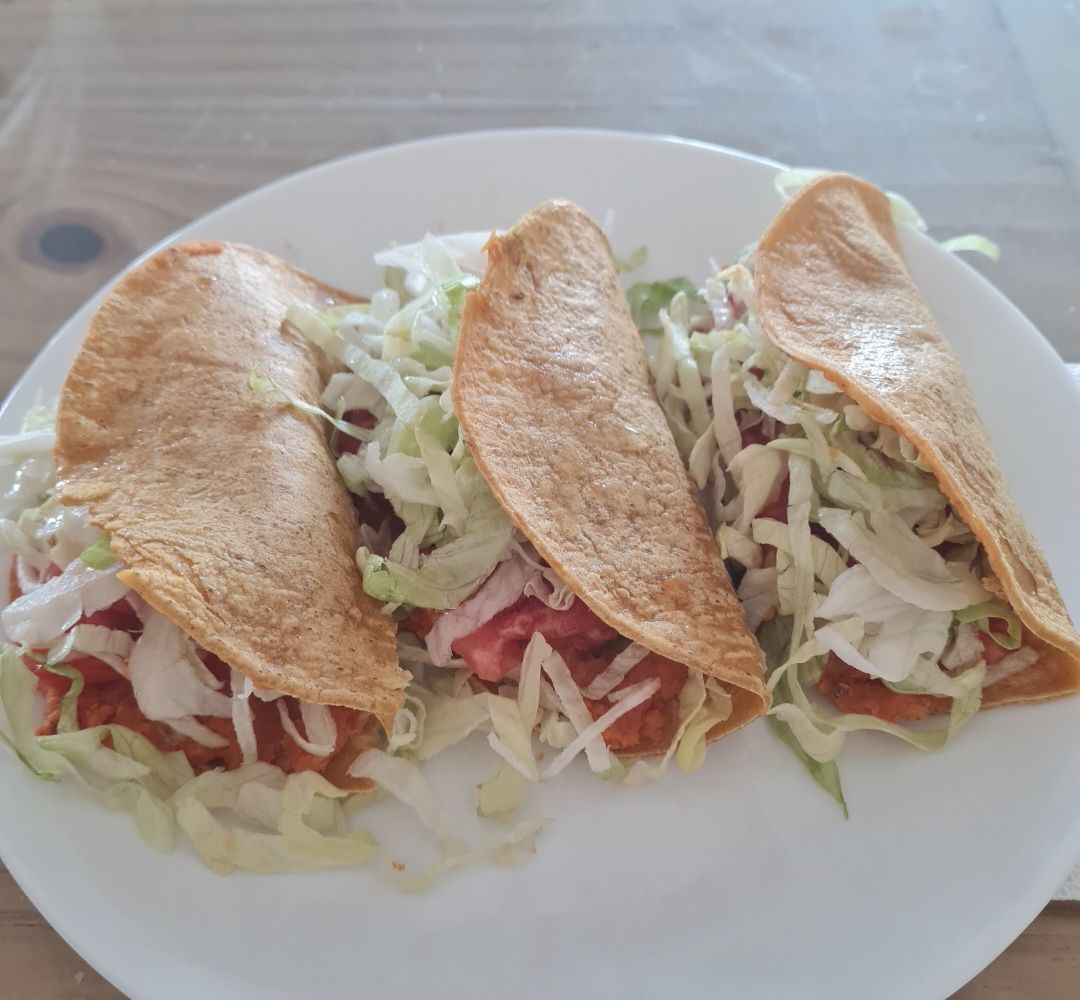
Ingredients:
* sweet potato
* jar of tomato salsa
* package corn tortillas (organic)
* fresh chopped tomato
* raw broccoli-slaw or shedded lettuce
* avocado (or avo-tomatillo salsa)
Instructions:
* wrap sweet potato in slightly dampened terry cloth towel & microwave until potato is soft
* peel & mash w/ fork
* add some salsa
* wrap tortillas in clean (slightly dampened) kitchen towel & heat for just a few seconds (this makes tortillas flexible!)
* fill softened tortillas w/ potato mixture & avocado, then fold in half to form soft tacos
IF YOU LIKE SOFT TACOS YOU ARE FINISHED HEATING. CONTINUE IF YOU WANT A LITTLE CRUNCH
* heat frying pan to medium-low (try cast iron & brush it w/ tiniest bit of avocado oil)
* grill both sides of folded tacos using weighted press (avoid adding more oil) & set them upon dry paper towel to drain, if needed
* pry slightly open to stuff w/ shredded greens & tomato
* enjoy!
Are Dates Good for You? Benefits, Nutrition & More
Summary
Dates, a fruit with a history spanning over 6,000 years, are more than just one of the world’s sweetest natural sweeteners. Are dates healthy, or just a sugary indulgence? This in-depth article explores the surprising health benefits of this “fruit of kings,” including the surprising truth about their glycemic index. Find out about the most popular varieties and the best ways to incorporate them into your diet. And stay until the end for three amazing date-based recipes (including one of the most popular we’ve ever published!).
🥦🧀 CHEESY BROCCOLI HASH BROWN BAKE🔥 Easy, Lazy & Weight Loss Friendly!!
Ingredients:
🥦 Broccoli
🥔 1–2 potatoes
🌱 Silken tofu
🥒 Courgette
🥛 Soy milk
🧄 Garlic powder
🧀 Nutritional yeast
🌶️ Smoked paprika
🧂 Salt
🍎 Splash of apple cider vinegar
🥄 Cornstarch
Method:
1️⃣ Steam your broccoli until tender.
2️⃣ Grate your pre-steamed potato directly onto a baking tray.
3️⃣ Add the steamed broccoli to the tray and grate over some courgette to make the dish even more voluminous.
4️⃣ For the cheesy sauce, add silken tofu, nutritional yeast, smoked paprika, salt, garlic powder, and a splash of
apple cider vinegar to a blender.
5️⃣ Add the cornstarch to help thicken the sauce, then blend everything until completely smooth and creamy.
6️⃣ Pour the cheesy sauce over the vegetables and mix everything together until every veggie is coated.
7️⃣ Bake in the oven until golden and crispy on top. ✨
Rice Cake Treats
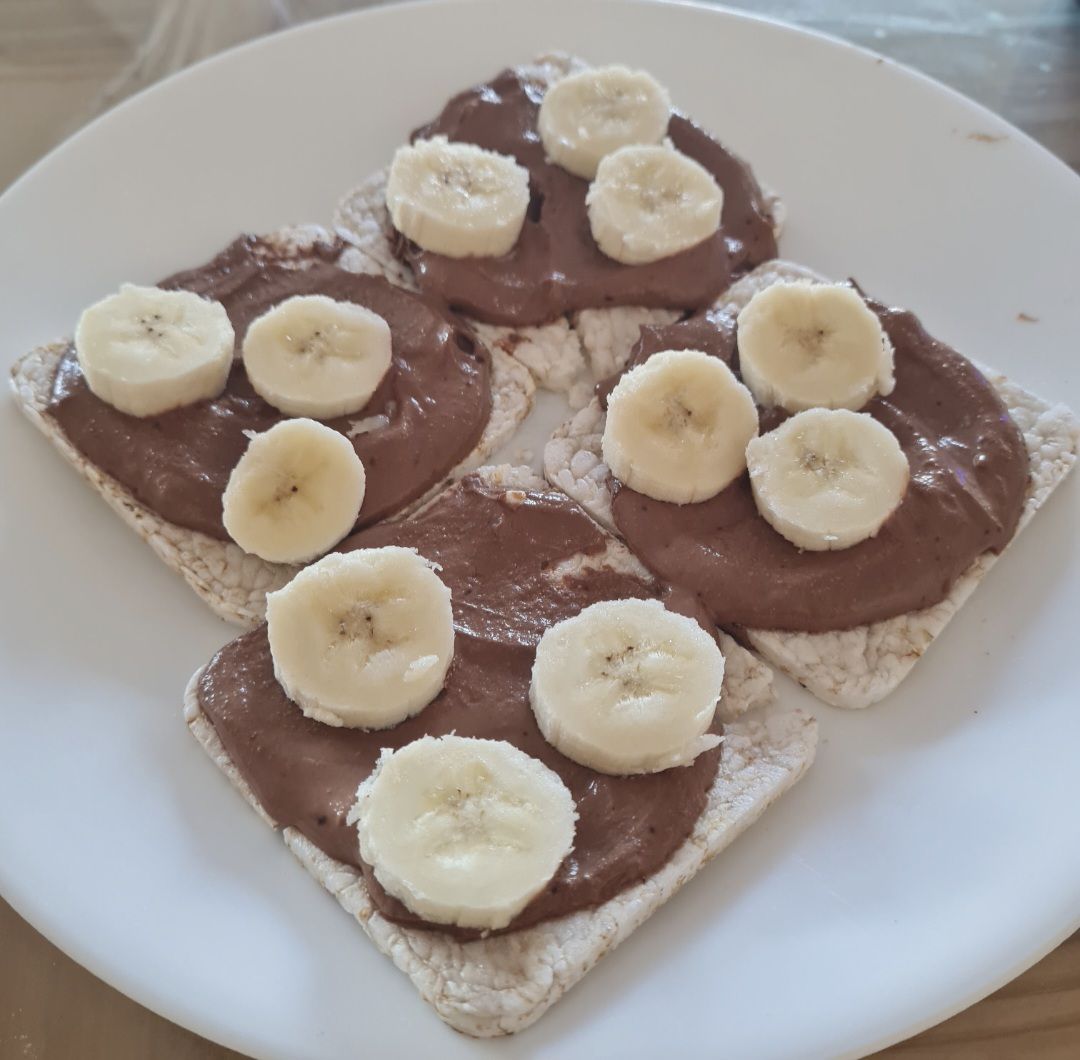
Mix the icing
- Peanut butter powder
- Cacao powder
- Coconut palm sugar (just a sprinkle)
- Water or plant milk
Frost the rice cakes
Top w/ sliced banana
🍫 CHOCOLATE LAVA CAKE🔥 Healthy Vegan Weight Loss Style!!
Ingredients:
🥦 Cauliflower
🌾 Oats
🍌 Banana
🥣 70g Tofu
🥜 PB&J powder
🍫 Cocoa powder
🍁 Maple syrup
🌼 Vanilla
🥄 Baking powder
🥛 Soy milk
🌱 Flaxseed
🫐 Frozen blueberries
Method:
1️⃣ Boil the cauliflower until soft.
2️⃣ While the cauliflower is cooking, add the oats, banana, tofu, PB&J powder, cocoa powder, maple syrup, vanilla, baking powder, soy milk, and flaxseed to a blender.
3️⃣ Add the cooked cauliflower and blend everything together until completely smooth and creamy.
4️⃣ Transfer the mixture into a microwave-safe cup or bowl.
5️⃣ Sprinkle the blueberries over the top.
6️⃣ Microwave for 6–7 minutes, or until the cake is cooked through.